
Customize a PQD Template and make it your own.
1. Open Template Editor
Open PQD Playbook in PowerPoint. In the PQD Playbook panel, select the Template Editor icon.
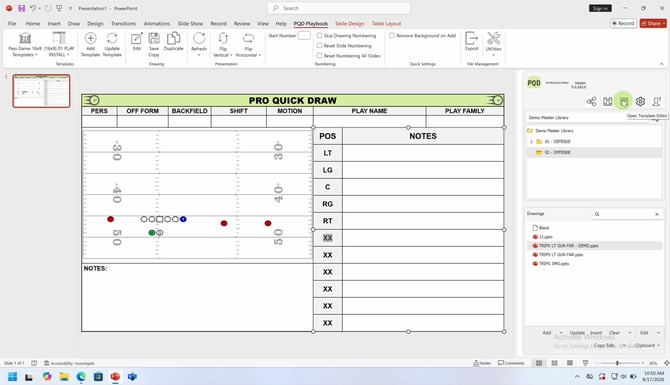
Open Template Editor from the PQD Playbook panel.
2. Copy the template you want to customizeIn Template Editor, select the template you want to use as your starting point. Select Copy Edit, enter a name for the new template, and confirm the name by selecting the check mark.
Note: Do not edit the original PQD template if you want to preserve a clean default version.
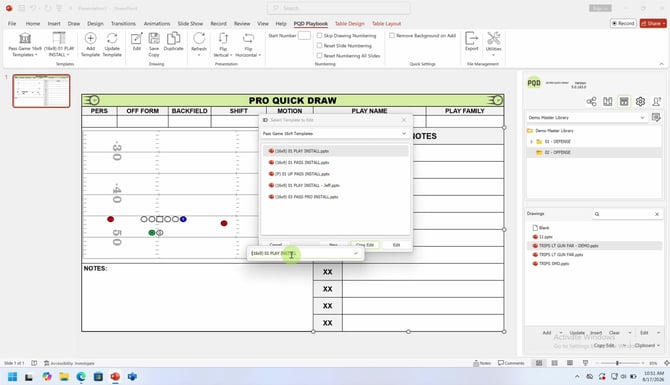
Use Copy Edit and give the customized template a unique name.
3. Update the position labelsIn the Template Editor panel, replace the default position labels with the terminology used in your system. In the example shown, the skill-position labels are changed to X, S, Y, Z, H, and Q.
Note: These labels become part of the template, so the correct position names are already in place each time you use it.
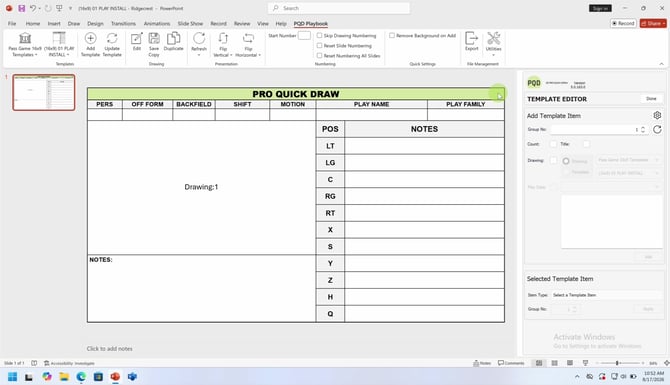
Replace the default labels with the position names used by your team.
4. Update the header and remove unwanted brandingEdit the header text so it reflects your program. For example, change the title to your team or organization name. Delete any logo elements you do not want to keep.
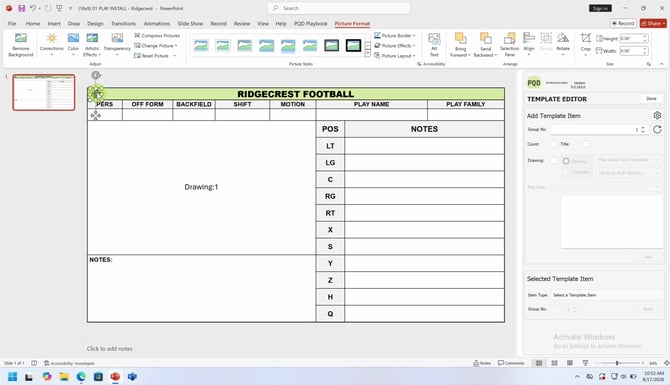
Update the template header with your program name.
5. Add your team logoIn PowerPoint, select Insert > Pictures > This Device, locate your team logo, and insert it. Resize the logo so it fits cleanly within the template. To place the same logo on both sides of the header, duplicate the first logo (Ctrl+D in the video example) and position the copy on the opposite side.
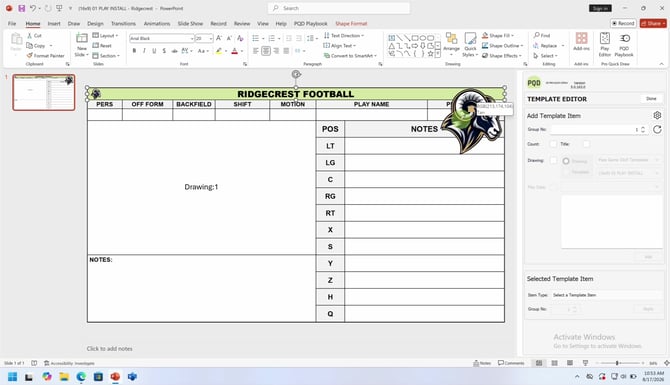
Insert, resize, and position your team logo.
6. Match the template colors to your brandingSelect the shape or header area whose color you want to change. Open Shape Fill and choose a team color. To match a color directly from your logo, select Eyedropper and sample the desired color from the logo. Resize and reposition the logo afterward if needed.
Note: Using Eyedropper helps keep the template colors consistent with the exact colors in your logo.
When the template looks the way you want, select Save in Template Editor. Your customized version is now available for future slides.
8. Apply and verify the new templateOpen a new slide and open PQD Playbook. Select your newly created template, then select Update. Add a drawing to confirm that the team branding and customized position labels appear correctly.
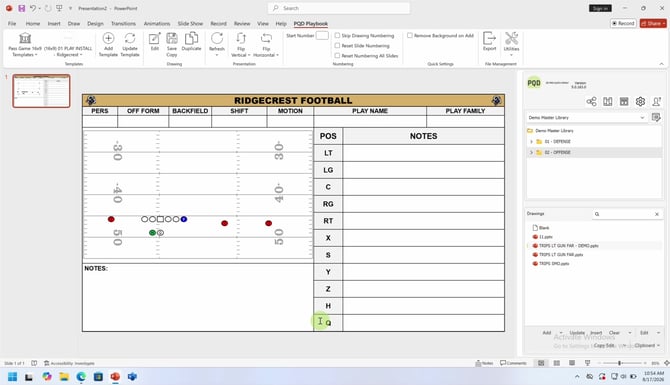
Apply the saved template and verify the customized labels and branding.
ResultYou now have a reusable Pro Quick Draw template built around your program. Future slides can start with your team name, logos, colors, and position terminology already configured, reducing repetitive formatting and keeping your playbook presentation consistent.
Tips- Keep the original PQD template unchanged so you always have a clean starting point.
- Use a clear template name that distinguishes the customized version from the default template.
- Set position labels in the template instead of changing them manually after adding each play.
- Use PowerPoint's Eyedropper when you want template colors to match your logo precisely.
- After saving, test the template on a new slide before using it throughout a playbook.